General Windows keyboard shortcuts
Alt + Tab
Switch between open applications in all versions of Windows. Reverse the direction by pressing Alt + Shift + Tab at the same time.
Ctrl + Tab
Switches between program groups, tabs, or document windows in applications that support this feature. Reverse the direction by pressing Ctrl + Shift + Tab at the same time.
Alt + double-click
Display the properties of the object you double-click on in Windows 95 and later. For example, doing this on a file would display its properties.
Alt + Print Screen
Create a screen shot only for the active program window in all versions of Windows. For example, if you opened the calculator and did this only the calculator window would be created as a screen shot. If just thePrint Screen key is pressed the whole screen will be made into a screen shot.
Ctrl + Alt + Del
Open the Windows option screen for locking computer, switching user, Task Manager, etc. in later versions of Windows. Pressing Ctrl+Alt+Del multiple times will reboot the computer.
Ctrl + Shift + Esc
Immediately bring up the Windows Task Manager in Windows 2000 and later.
Ctrl + Esc
Open the Windows Start menu in most versions of Windows. In Windows 8 this will open the Start screenand in Windows 3.x this would bring up the Task Manager.
Alt + Esc
Switch between open applications on Taskbar in Windows 95 and later.
Alt + Space bar
Drops down the window control menu for the currently open Windows program in Windows 95 and later.
Alt + Enter
Opens properties window of selected icon or program in Windows 95 and later.
Alt + Space bar
Open the control menu for the current window open in all versions of Windows.
Shift + Del
Will delete any file or other object without throwing it into the Recycle Bin in Windows 95 and later.
Hold down the Shift key
When putting in an audio CD or other CD that uses Autoplay, holding down the Shift key will prevent that CD from playing.
Windows function key shortcuts
Below is a listing of keyboard shortcuts that use the keyboard function keys. See our what are F1 through F12 keys page for a full listing of what function keys do with all other programs.
F1
Activates help for current open application. If you're at the Windows Desktop, this will activate the help for Windows.
F2
F3
Starts find or search when at the Windows Desktop in all versions of Windows.
F4
In Windows 95 and later this opens the drive selection or address bar when browsing files in Windows Explorer.
- Pressing Alt + F4 closes the current open program window without a prompt in all versions of Windows.
- Pressing Ctrl + F4 closes the open window within the current active window in Microsoft Windows. This will only work in programs that support multiple windows or tabs in the same program window.
F6
While in Windows Explorer, this will move the cursor to different Windows Explorer pane or in Windows 7 browse available drives.
F8
Pressing F8 over and over as the computer is booting will start the computer in Safe Mode.
F10
Activates the File menu bar in all versions of Windows.
- Simulates a right-click on selected item. This is useful if right-click is difficult or impossible using the mouse.
Windows keyboard key shortcuts
Below is a listing of Windows keys that can be used on computers running a Microsoft Windows 95 or later and using a keyboard with a Windows key. In the below list of shortcuts, the Windows key is represented by "WINKEY" and because not all these shortcuts will work in all versions of Windows we've mentioned what versions of Windows support each Windows key shortcut key.
All versions of Windows
WINKEY
Pressing the Windows key alone will open or hide the Windows Start menu. In Windows 8, this will open or hide the Start screen.
WINKEY + F1
Open the Microsoft Windows help and support center.
WINKEY + Pause / Break key
Open the System Properties window.
WINKEY + D
Opens the Desktop to the top of all other windows.
WINKEY + E
Open Microsoft Windows Explorer.
WINKEY + F
Display the Windows Search or Find feature.
WINKEY + Ctrl + F
Display the search for computers window.
WINKEY + L
Lock the computer and switch users if needed (Windows XP and above only).
WINKEY + M
Minimizes all windows.
WINKEY + Shift + M
Undo the minimize done by WINKEY + M and WINKEY + D.
WINKEY + R
Open the run window.
WINKEY + U
Open Utility Manager or the Ease of Access Center.
Windows XP only
WINKEY + Tab
Cycle through open programs through the Taskbar.
Windows 7 and 8 only
WINKEY + 1-0
Pressing the Windows key and any of the top row number keys from 1 to 0 will open the program corresponding to the number of icon on the Taskbar. For example, if the first icon on the Taskbar was Internet Explorer pressing WINKEY + 1 would open that program or switch to it if already open.
WINKEY + (Plus (+) or Minus (-))
Open Windows Magnifier and zoom in with the plus symbol (+) and zoom out with the minus symbol (-).
- Press the WINKEY + ESC to close the Magnifier
WINKEY + Home
Minimize all windows except the active window.
WINKEY + P
Change between the monitor and projection display types or how second screen displays computer screen.
WINKEY + T
Set the focus on the Taskbar icons
WINKEY + Left arrow
Shrinks the window to 1/2 screen on the left side for side by side viewing.
WINKEY + Right arrow
Shrinks the window to 1/2 screen on the right side for side by side viewing.
WINKEY + Up arrow
When in the side by side viewing mode, this shortcut takes the screen back to full size.
WINKEY + Down arrow
Minimizes the screen. Also, when in the side by side viewing mode, this shortcut takes the screen back to a minimized size.
Windows 8 only
WINKEY + ,
Peek at the Windows Desktop.
WINKEY + .
Snap a Windows App to the sides of the screen. Pressing it multiple times will switch between the right and left-hand side of the screen or unsnap the app.
WINKEY + Enter
Open Windows Narrator
WINKEY + C
Open the Charms.
WINKEY + G
Cycle through Desktop gadgets.
WINKEY + H
Open Share in Charms.
WINKEY + I
Open the Settings in Charms.
WINKEY + J
Switch between snapped apps.
WINKEY + K
Open Devices in Charms.
WINKEY + O
Lock the screen orientation.
WINKEY + X
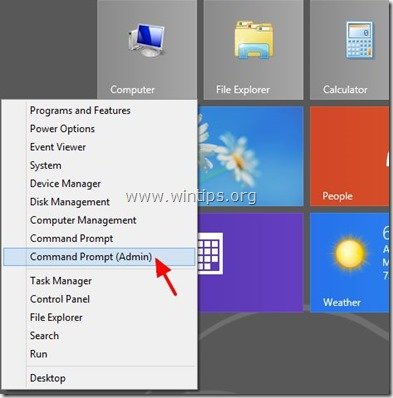
Open the power user menu, which gives you access to many of the features most power users would want to use such as Device Manager, Control Panel, Event Viewer, Command Prompt, and much more.





.jpg)
.jpg)


